The Lightroom Tutorials section on PhotoTraces is one of the most popular parts of the site. Why? Regardless of whether you are a professional photographer or an aspiring beginner, Lightroom is the best tool for the job, and you need to know how to use it.

Lightroom is only 10 years old but, in such short period of time, it has become the most important tool in photography. Its biggest advantages are its easier learning curve compared to Photoshop and its ability to edit a larger number of photos in a very short period of time.
The Truth: Lightroom covers every aspect of modern photography: image organization, photo editing, and publishing. Lightroom is like the Swiss knife of modern photography.
Over the years, the list of editing tools I use in my photography has drastically changed. In the beginning, the center of my workflow was Photoshop. Plus, I used a variety of plugins and dedicated applications to perform specific tasks (HDR, for example) in my photo editing. Since the introduction of Lightroom, I have noticed a great reduction in the number of tools I use in my photo editing because Lightroom has replaced most of them.
Even my use of Photoshop is minimal. If 100% of my editing was performed in Photoshop 10 years ago, I now use it in less than 10% of cases because the rest of my editing is covered by Lightroom.
The Lightroom Tutorials section of PhotoTraces.com covers different aspects of the program, starting with general concepts like organization and progressing to more advanced topics like portrait retouching.
Free Lightroom Tutorials
If you are a beginner, I suggest starting with my very first tutorial titled “What is Lightroom?“
How To Convert RAW To JPEG In Lightroom
Even if you are a beginner in photography, you probably know that RAW files are the best way to go regarding quality and editing options. But what if you need to convert your RAW files to JPEG?
A RAW file is a digital image file containing the unprocessed data from a digital camera. A JPEG file is a compressed image file format. Converting a RAW file to JPEG means that the image is processed and compressed into a smaller file size.
In Lightroom, you can export your RAW files as JPEGs with just a few clicks. This free Lightroom tutorial will show you how to do this quickly and easily!
What Is Adobe Lightroom?
Lightroom is a powerful photo-editing program that can be used to make quick and easy edits to your photos. It is beneficial for those who shoot in RAW format, as it offers a wide range of editing options. It employs the concept of non-destructive editing.
Lightroom can be used to adjust exposure, white balance, contrast, saturation, and more. It also offers a variety of tools for managing your photos, such as creating albums, rating, tagging, and searching.
Lightroom was initially released in 2006 and has become a popular choice for photographers seeking an easy-to-use yet powerful tool for managing their digital photos.
How to Copy and Paste Edits in Lightroom
If you find yourself frequently making the same edits to multiple photos in Adobe Lightroom, copying and pasting those edits is a way to save time. This free Lightroom tutorial will show you how to do just that.
You’ll learn how to copy edits from one photo and apply them to others and how to paste edits onto multiple images at once. With this handy technique, you’ll be able to edit large batches of photos with ease quickly.
How to Add Watermark in Lightroom Using Presets
A watermark is a logo or text added to an image. Many professional photographers add watermarks to their photos to protect the creators’ copyright.
Watermarks can be added in Lightroom using presets. Presets are a saved set of editing steps that you can apply to an image with one click.
In this free Lightroom tutorial, I will show you how to create a watermark preset so that you reuse it to apply watermarks to multiple photos in Lightroom during the export process.
Film Look in Lightroom
We all love the look of film. The organic grain, the natural colors…
But if you’re a fan of film photography but find the cost and hassle of shooting on film impractical, you’re in luck. Because Lightroom has a few tricks up its sleeve to help you get that film look, in this Lightroom tutorial, we’ll show you how to make your photos look like film in Lightroom.
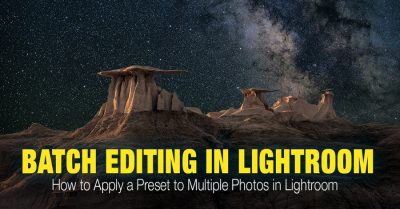
How to Batch Edit in Lightroom
Batch editing is a process where you can simultaneously apply the same edits to a group of photos. It is a huge time saver, especially when you have large sets of images that need the same edits. Lightroom makes batch editing easy with its presets and sync feature.
In this Lightroom tutorial, we’ll show you how to batch edit your photos in Lightroom. You can use batch editing to adjust the exposure, white balance, saturation, and other settings. Select the photos you want to edit, make your changes, and click the “Sync” button. Your changes will be applied to all of the selected images.
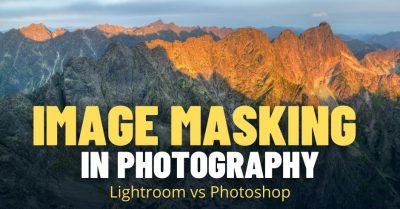
Image Masking in Photography
Masking in photography is a technique whereby you can edit one area of an image without affecting the rest of the image. The masking is particularly useful when you want to make global changes to an image, such as exposure or white balance, but don’t want those changes to affect a specific area.
In this Lightroom tutorial, we’ll be exploring how to use Lightroom’s image masking tool to make targeted adjustments to your photos. It can be a valuable technique when you want to selectively edit specific areas of an image without affecting the rest. We’ll go over creating luminosity and color masks and how to use each to achieve different results.
How to Cull Photos in Lightroom Fast
Culling photos is an essential but often time-consuming part of the post-processing workflow. If you’re unfamiliar with the term, culling photos means selecting the best ones from a group of images. And while it may seem like a tedious task, there are quite a few ways to speed up the process. And Lightroom is one of the best software options for culling photos.
In this Lightroom tutorial, we’ll show you how to quickly and easily cull photos in Lightroom. By following these simple steps, you’ll be able to save time and get the best results in choosing the best images.
Lightroom Workflow Tips
When it comes to managing photos, Lightroom is one of the most popular software options available. The program offers a wide range of features and can be customized to fit almost any post-processing digital photography workflow.
In this tutorial, we’ll share some tips on how to streamline your Lightroom workflow. Whether you’re a beginner or a pro, these tips will help you save time and get the most out of Lightroom.
10 Second Lightroom Skin Tone Fix
Having a natural skin tone in your portrait photos is essential to create a professional look. Luckily, if your skin tone is unnatural in a photo, there are a few things you can do to fix it in Lightroom. With the help of the Hue/Saturation/Luminocity panel, you can easily adjust skin tones in Lightroom.
In this tutorial, we’ll show you how to adjust skin tone in Lightroom so that your subjects always look their best. You’ll learn how to use the HSL panel to fine-tune skin tones, as well as how to use the Color Balance tool to correct overall color casts.
Free Lightroom Tutorials | Conclusion
Free Lightroom tutorials provide an excellent introduction not only to the fundamentals of the program but also to some advanced features.
The tutorials offer step-by-step instructions on how to use the various features of Lightroom, as well as tips and tricks for getting the most out of the program. With these tutorials, you’ll be able to start using Lightroom like a pro in no time!


