I took the featured free RAW photo in San Franciso from the Golden Gate Post Card Viewpoint.
I used the Sony a6000 and my favorite ultra-wide and ultra-compact Sony 10-18mm lens.
Exif Data:
- Camera: Sony a6000
- Lens: Sony 10-18mm f/4
- Aperture: f/9
- Shutter Speed: 1/125s
- ISO: 100
- Focal length: 14mm

Free RAW Photos for Editing Library
When you edit the RAW photo, you have to address 3 main issues.
- the photo is slightly overexposed
- it is crooked (no idea what I was thinking)
- there are plenty of distracting objects (debris, cars) in the foreground.
Exposure
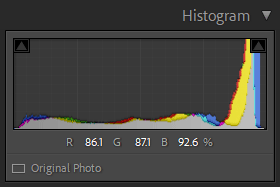
I overexposed the photo by 1/2-2/3 stops on purpose. That was the time when I started experimenting with the “exposure to the right” technique. The idea is to maximize sensor saturation with light but without clipping the highlights. You adjust the final exposure in Lightroom during post-processing.

Using the “exposure to the right” technique allows you to produce the highest quality RAW images with the least amount of digital noise.
To learn how to edit overexposed images in Lightroom, check my dedicated tutorial here.
Geometry of the Shot
Because of the scene’s immense scale, I had to tilt the camera backward to fit all of the scene’s elements into the frame. As a result, the shot has a distorted perspective in the form of converging vertical lines.
You need to fix it.
You can find the detailed tutorial on how to fix the perspective distortion in Lightroom here.
Cleaning
And finally, there too many distractions for my teste in the foreground.
You can find construction debris, parked cars, and the bright cabin on the right side of the frame. The editing step to remove the distractions is optional, but I find it always helps to simplify the composition.
To learn how to clean up the images in Lightroom, check my tutorial here.
Good luck with editing.
My RAW Editing Version
And here is my editing version of the free RAW image. You can access all my editing steps from the Snapshot panel of the Develop module in Lightroom.

As usual, my first goal was to improve compsoiton of the photo.
I used the Crop Overlay tool to crop the image tighter without changing the original aspect ratio of 3:2.
Next, I jumped to the Transform panel, and with the help of 3 guided lines (2 verticals and 1 horizontal), I fixed the vertical distortion.
I used the Basic panel sliders to adjust the exposure.
Finally, I used the Crop Overlay tool to remove unnecessary objects from the foreground. I removed debris, 3 parked cars, a couple of people, and even the white cabin in the foreground.
What About Copyright?
All free raw images I share, I took myself, and they belong to me. They are not sourced from the public. But they are still copyrighted.
You are free to edit my RAW photos. And if you want to share them on your blog or social media, go for it; all I am asking is to credit me with the link to my site. And you can not use them commercially.
Free RAW Photos Library
Please remember to download my free Lightroom develop presets for faster raw editing.


