This is my third article in mini-series dedicated to abstract photography.
In the first article, I demonstrated how you can start creating abstract landscapes with ease. In the second installment, I introduced you to the world famous photographers who explored the field of artistic abstraction.
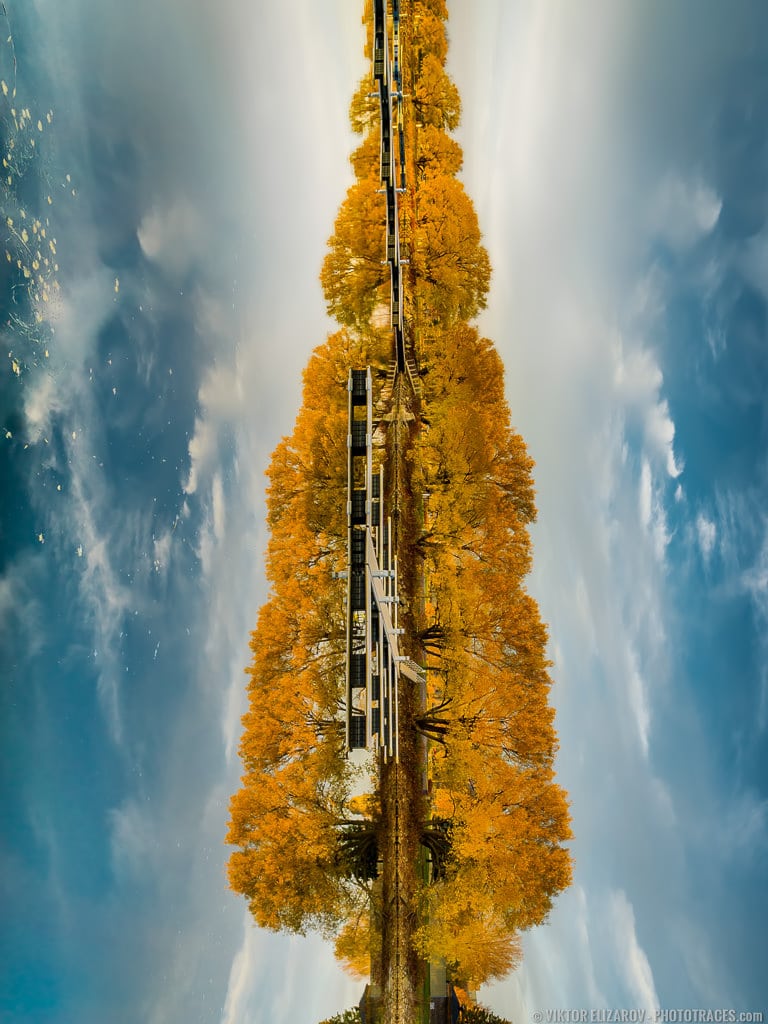
And finally, today is a quick demonstration how I created my latest abstract capture.
When I went to a local park in the middle of November, my initial intention was to take advantage of fast disappearing fall colors. But, when I realized that it was an unusually quiet day without any wind, which is rare for Montreal in late fall, I decided to concentrate on clear and uninterrupted water reflections.
Loc: 45.429513, -73.679207
Shooting
When I walked by empty Lachine marina I spotted almost perfect symmetry formed by the water reflection. I knew right away it was my chance to create something interesting.I took a few bracketed shots on a tripod and was on my way.
- Camera: Sony a6000
- Lens: Sony 16-70
- Focal Length: 16mm
- Shooting Mode: Aperture Priority (A)
- ISO: 100
- Aperture: F8
- Shutter Speed: 1/15s
- Bracketing: 3 (-1, 0, 1)
- Tripod: FEISOL Tournament CT-3442
Processing

In Lightroom, I started with flipping the photo clockwise. I used Rotate Right (CC) functionality.
Next, I used the Crop Tool on Develop Module to make sure the horizon was perfectly vertical (what an irony) and symmetrical.
The rest was a straightforward Lightroom Rapid Editing. I applied Point Lobos preset from Landscape Collection. I dialed down the effect to 90% using virtual opacity functionality of PLUS collection.
Last, I used TOOLKIT to boost the contrast and the colors.
The Lightroom Editing Formula: Point Lobos 90% (9, 14, 17, 31)
Photoshop: color correction, contrast.
Photoshop Plugins:
- Topaz DeNoise was used to reduce digital noise.
.