Since I released my Free Lightroom Preset Collection it has been, by far, the most popular resource on my blog. It was downloaded thousands of times.
The readers of my blog who are familiar with the program have no problems to figure out how to use Lightroom presets but, for the photographers who are just starting to learn the program, it is not always easy and straightforward. Every day I receive multiple questions related to how to install Lightroom presets and how to use Lightroom presets.
I decided to address the most common questions and challenges by putting together a short tutorial that demonstrates the best practices on how to use my Lightroom Presets.

The goal of the Lightroom Presets Workflow is to streamline and simplify the process of photo editing and also to save time on processing a high volume of digital photographs. I hope my preset collection will help you accomplish just that.
Installation
If you have a problem installing the presets, I have a simple tutorial on how to install the Lightroom presets in just a couple of minutes. How to Install Lightroom Presets
Setting up the Lightroom
After you installed my Lightroom Presets and restarted Lightroom, you need to switch to the DEVELOP module of the Lightroom by selecting the DEVELOP option from the top menu.

When you are in the DEVELOP MODULE, on the left SIDE, select the PRESETS PANEL and open it.

Inside of the PRESETS PANEL you will find two new preset folders:
- PhotoTraces FREE Collection
- Photo Traces TOOLKIT

To start, open the Free Collection Folder.

How to use Lightroom presets
For today’s demonstration, I selected three very different photographs:
- the landscape photo I took in Hawaii (RAW format)
- the urban shot of New York (JPG format)
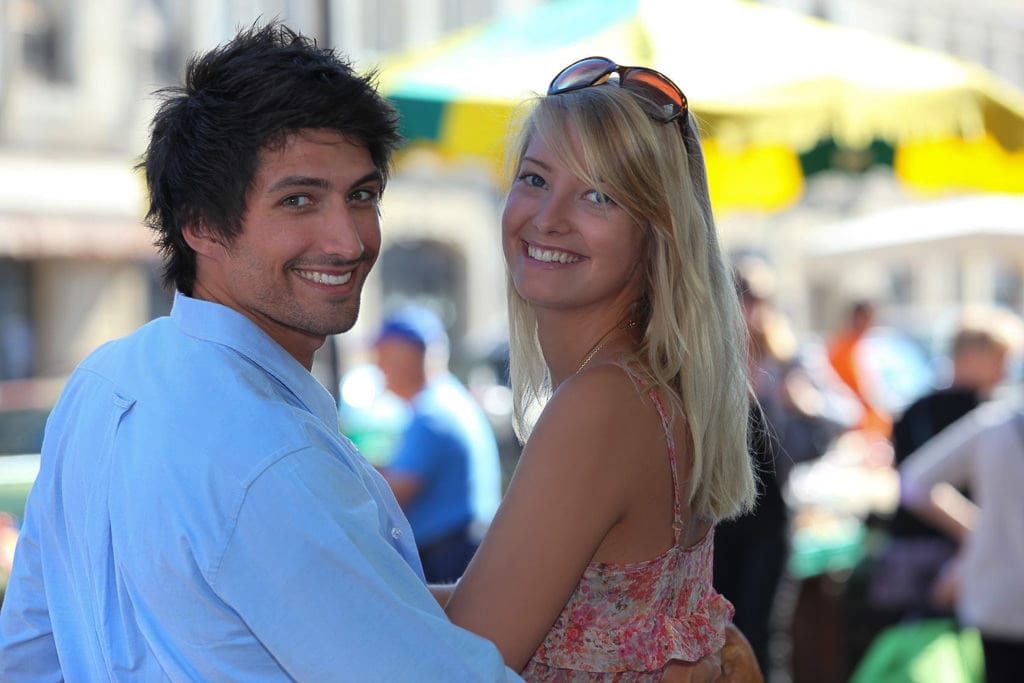
- the portrait of a young couple (JPG format)
By choosing such different photos, I want to demonstrate that you can use my Lightroom presets with pretty much all types of photographs and formats (JPEG, RAW, DNG, PNG).
At this point, you have two choices. You can follow this tutorial by using your own photos or, you can download the exact photos I used for this demonstration and follow the tutorial step by step.
Here, you can download the original images with instructions on how to import them.
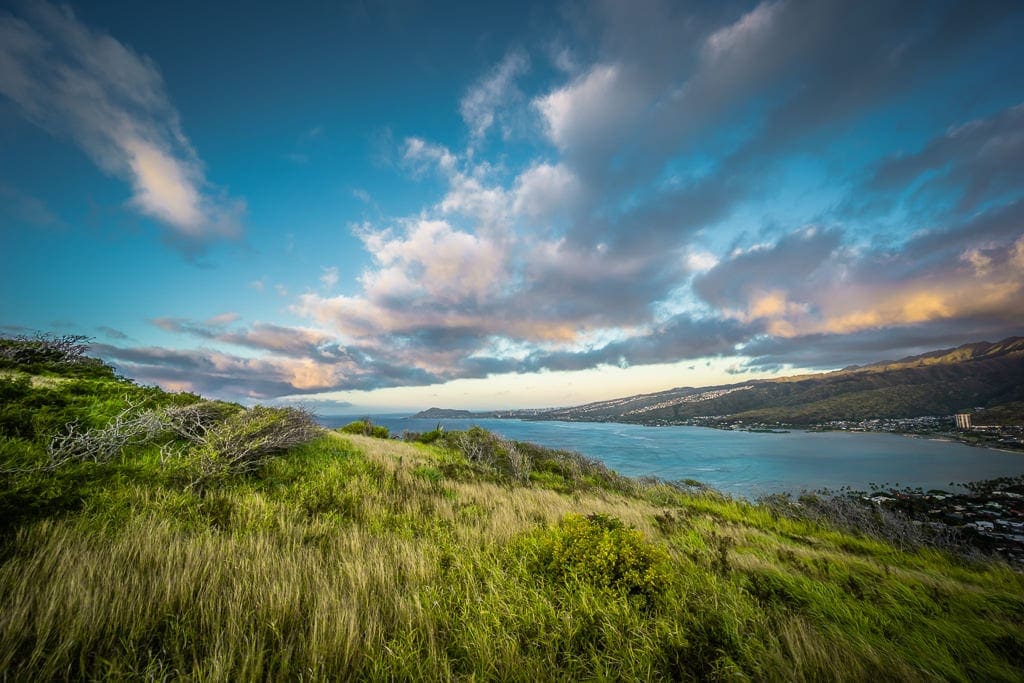
We start how to use Lightroom presets tutorial with the landscape photo.
How to use Lightroom presets with the Landscapes
As you can see, the straight from the camera photo is dull and lifeless; there are no contrast or colors, and the sky looks washed out.

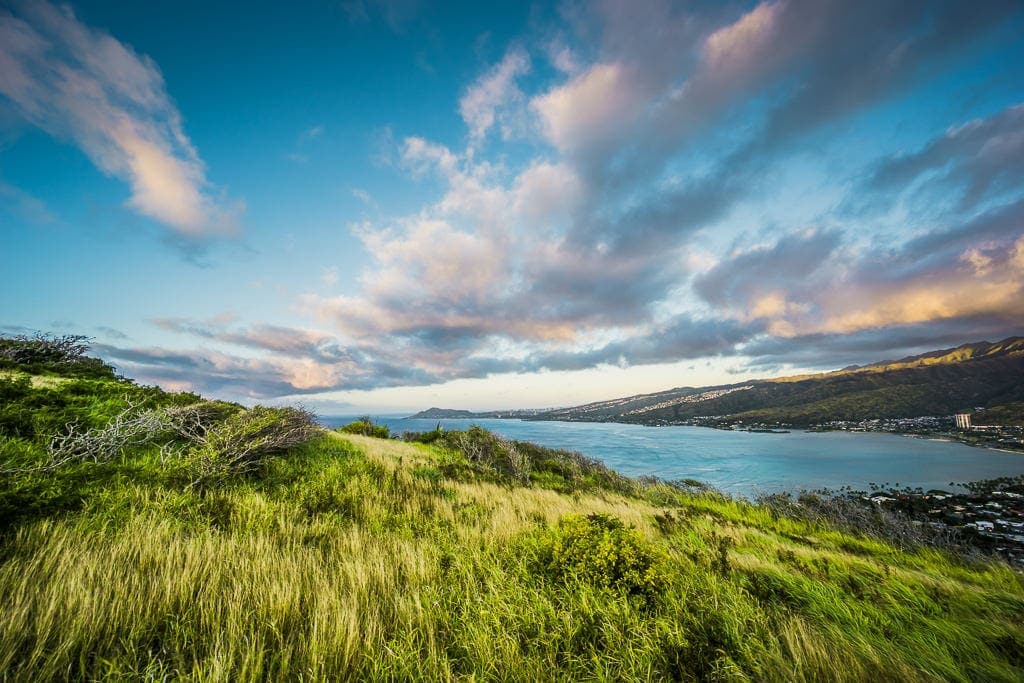
The fastest and the easiest way to bring this image back to life is to use Preset Based Editing.
With only one click we can completely change the way it looks.
To apply the preset to the selected image all you have to do is click the name of the preset in the PRESETS Panel.
Natural Preset
The Natural Preset is one of my favorites as it gives your landscapes a natural look with rich colors and well-defined skies.

The best way to use Lightroom Preset Based Editing is to go through the rest of the PRESETS and to see which one produces the look that you like the most.
Not every preset will work with every image, so the goal is to find the ONE that works the best.
HDR Blend
End of Summer

Harsh Shadows
Hawaii Sunset

Let’s say that I like the look of the NATURAL preset the most.
I like the result that the preset produces but the image is a bit too dark for my taste and I want to increase the contrast as well.
This is when the TOOLKIT comes into play.
The TOOLKIT is the collection of 40 Adjustments. Each adjustment does not create any specific look or style, but it helps us to fine tune the photo after applying one of the presets.

- To make the image brighter, all I have to do is to apply 01. EXPOSURE + adjustment and the photo looks much nicer.
- I also want to open up the shadows by making only the dark areas of the image brighter. This is a trial and error process. I start by applying the OPEN SHADOWS adjustments from #07 to #10. I can see that 08. Open Shadows ++ is a bit too dark and 10. Open Shadows ++++ is a bit too bright, which means that 09. Open Shadows +++ is the right adjustment for this particular image.
- Next, I am going to increase contrast by applying 12.CONTRAST + and 17. CLARITY ++. (The Clarity is the variation of the Contrast which amplifies the details of the image).
- At this point, I like what I see but I want to try and make the sky area darker. I start applying adjustments 35, 36, 37 with the goal to find the best fit for this photo. 36. ADJUSTMENT ++ looks just right.

How to use Lightroom presets with the Cityscapes
For the second demonstration, I specifically selected a much more challenging photograph. The shot of Lower Manhattan is way underexposed plus, I took it on an overcast day and, as a result, it has no contrast or colors.
To make it presentable we have to fix the exposure, recover shadows, increase contrast and saturation.

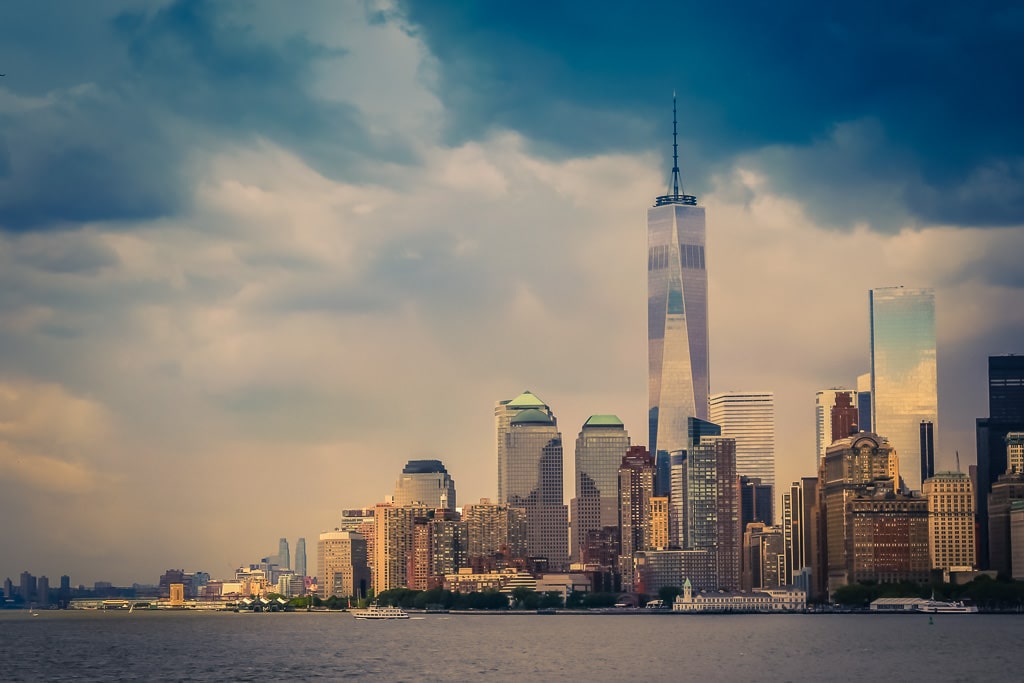
Here are the exact editing steps I used to achieve the final look:
- Gentle Wave preset
- 03 Exposure +++
- 09 Open Shadows +++
- 13 Contrast ++
- 17 Clarity ++
- 21 Vibrance ++
- 24 Saturation +
- 32 Vignetting ++
Here is the Lightroom Preset Editing Formula for this shot where each number inside the brackets represents a specific ADJUSTMENT from the TOOLKIT collection:
Gentle Wave (03, 09, 13, 17, 21, 24, 32).
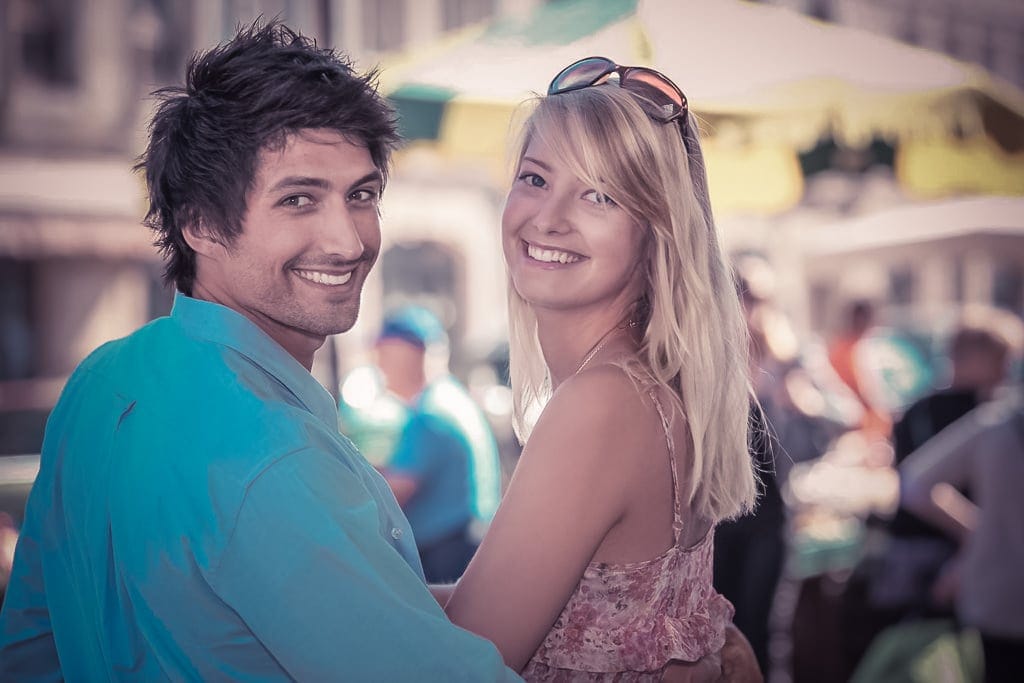
How to use Lightroom presets with the Portraits
For the final demonstration, I selected an outdoor portrait of two people. You will notice that both faces of the couple are underexposed, the skin color tone is shifted towards red and the skin is a bit oversaturated. We can address all of these issues by using the Portrait Presets.
Below, I created three different looks for the same portrait shot. Under each version, you can find my editing steps and the Preset Editing Formula.
My editing steps:
- CoffeTime preset
- 00 Exposure 0
- 08 Open Shadows ++
- 32 Vignetting ++
Lightroom Preset Editing Formula: CoffeTime (00,08,32)

My editing steps:
- Soft Shadows preset
- 01 Exposure +
- 07 Open Shadows +
- 33 Vignetting +++
Lightroom Preset Editing Formula: Soft Shadows (01,07,33)

My editing steps:
- In Style preset
- 00 Exposure 0
- 08 Open Shadows ++
- 33 Vignetting +++
Lightroom Preset Editing Formula: In Style (00, 08, 33)
Conclusion
I encourage you to download the demo images and start experimenting and creating your own editing formulas. Please use the comments section below the post to share your own editing formulas with the PhotoTraces community. I promise if you share your editing steps, I will personally try them out and give you a feedback.