For the Landscape TOOLKIT case study, I selected the photo I took in Utah. It is an unconventional view of Bryce Canyon from the town of Tropic.

Normally, I do not use the TOOLKIT for Landscapes as a stand-alone editing tool. But today I want to show you its full potential.
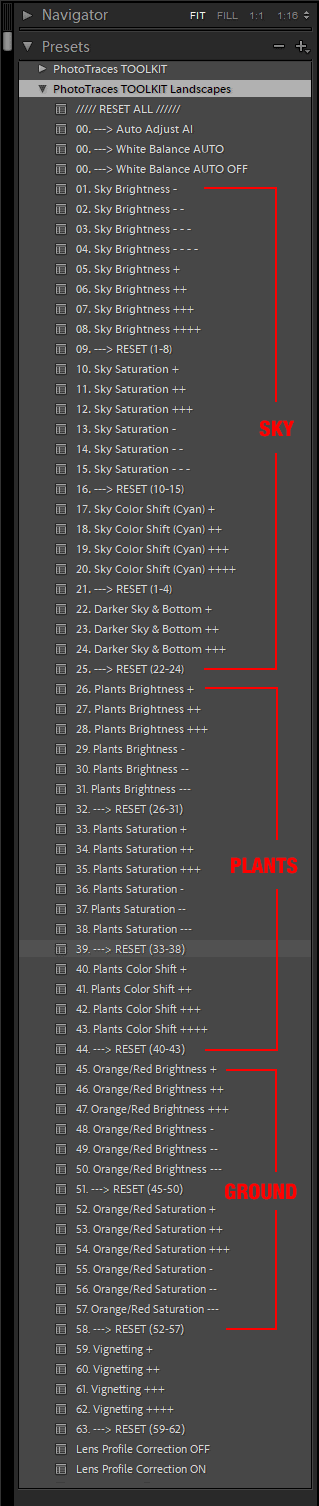
The main power of the TOOLKIT is it allows you to edit various areas of the photo separately, applying different settings to each area.
Editing Landscape Photo
Step 1 – Adjusting Exposure
As you can see the unprocessed image is overexposed by approximately half stop. And before we start the editing process we need to adjust exposure.
There are many different ways to adjust exposure in Lightroom but today we are going to use the simplest one, AUTO TONE.
AUTO TONE relies on AI and machine learning to evaluate any given image and to set proper exposure.
Simply, apply
00.—> Auto Adjust AI
next apply /// RESET ALL /// preset
preset and Lightroom does the rest.
Step 2 – Editing Sky
Next, we need to address the area of the sky, making it darker and more impactful in general.
We can achieve it by applying the following presets:
03. Sky Brightness —
13. Sky Saturation –
18. Sky Color Shift (Cyan) ++
22. Darker Sky & Bottom
Step 3 – Editing Vegetation
Now we need to beautify the foreground.
We can achieve it by making the vegetation brighter, more saturated, and by shifting the color tone towards the yellow hue.
28. Plants Brightness +++
35. Plants Saturation +++
41. Plants Color Shift ++
Step 4 – Editing Canyons and Mountains
We also need to edit areas of the mountains and canyons. After we added some punch to the sky and the vegetation, the mountains look uninspiring.
45. Orange/Red Brightness +
53. Orange Red Saturation ++
And in the final step, I added a mild vignetting.
59. Vignetting
Below you can see fully processed image.
